If you just used your phone without filling it up with pictures, videos, games, apps, or other junk and it still has it's memory filled up, skip to 3.
General space freeing techniques:
1. Uninstall all unneeded apps and games.
2. Delete or move (to SD card, cloud or computer) all pictures, videos, files you don't need.
3. Check your Downloads folder for any e-books, .apk or other files you may have downloaded and forgot there.
Storage Analyzer (free) can help determine which files take up most space.
Next step: deleting cached data:
1. Go to Settings->Storage->hold "Cached data" and a prompt will appear. Select "delete". Wait for it to delete and show refreshed free space left.
If you now have enough free space and you don't want to dig deeper, congrats on your new free space!
Advanced file deletion:
Disclaimer: The actions described below can damage the software of your phone, proceed at your own risk!
If you still suffer, open your favorite file manager and search for "photo_blob" files. They are image thumbnail cache of your Gallery. Mine were 400MB each (two of them). Delete them. They will be recreated next time you open your gallery or stock camera app. They will start building up in size again, but it will take a few months before it reaches the same size. The only drawback from deleting is that first time you open your gallery it will take a few seconds to recreate the new image cache.
Another location you might want to check is the MIUI folder. If it's size is in the gigabytes, open it and check size of each folder inside. Usually the Cloud backup stores local files in there, filling up the free space (for some reason).
If you still have gigabytes of mysterious Other files and cannot sleep at night, wandering what are those, go to Expert File deletion.
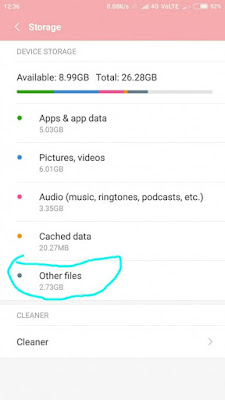 |
| On my own phone Other files was 6GB. |
Expert File deletion: deleting "Other files" (root required)
If you came to this website, you've probably watched at least three videos which didn't help and read that many articles with the same success rate.
Unfortunately next step only works on rooted phones. There maybe some "cleaner app" which deletes this, but since it is accessible only by root, I doubt it. You can try
Xiaomi File manager and see if it does the job by some integrated security permissions.
Step 1
Fire up your root application (in my case
Super SU).
Step 2
Fire up your favorite root capable File manager (in my case
Amaze)
and from it's menu of storage locations select /Root
Step 3. Super SU will ask you if you trust and wish to provide root access to the file manager - agree.
Step 4. Go to /Data/App folder
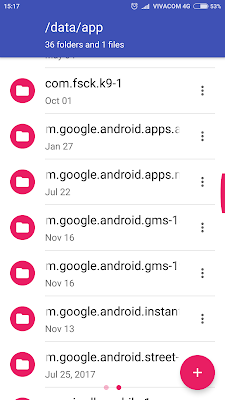 |
| The culprit in Xiaomi's root folder |
Unfortunately Amaze did not allow me to check folder size in root folders, so I had to manually check each folder manually until I found the culprit. It was Google Services which was creating backups each time I installed or uninstalled an app. Everyone of them was 200+MB and they were nineteen of them, dated back since I first started using the phone!
Exact naming was
com.google.android.gms-1 - Jan 2016
com.google.android.gms-2 - Feb
2017
com.google.android.gms-3 - Sept 2017
...
com.google.android.gms-19 - Nov 2018
After deleting all of them one by one (Amaze refreshes and kicks me back to the root folder after each folder deletion), the
Other files were reduced to only 900MB! That way I reclaimed back more than 5GB! My phone became a lot quicker and also stopped rebooting itself when it is out of memory.
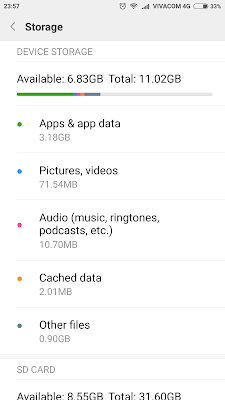 |
| Final result - Other Filesdecreased to only 900MB! |
It might be another app which caused this, so be careful! It is highly recommended to backup your data using
TWRP before deleting any root folders as this can make your phone unusable.
With this the space quest ends. This guide should work also on other Android phones. If you have found other ways to free up space on an
Android OS, please post in the comments below.
*The first phone reboot after deleting Other Files took about 2 minutes. It appears that Android OS is performing some boot time optimizations for the new free space. Please be patient on the first boot.


